
Panning for gold is a popular pastime in areas where gold deposits are common. Gold is frequently found in rivers and small creeks as it washes down from gold lodes through erosion.
Panning for gold isn’t difficult if you have the right supplies and know where to look. Read on to learn how to pan for gold in creeks and what you need to be successful at it.
How To Pan For Gold In Creeks
Table of Contents
Panning for gold in a creek bed is one of the easiest ways to find it in the wild if you can find a deposit. Below are three basic steps for finding gold in creeks.
Step One: Research Areas With Gold Deposits And Create A Plan
Map out probable locations for gold deposits to begin identifying sections to prospect one by one is the best way to pan a creek for gold systematically.
Prospecting for gold can feel overwhelming without a plan. There are plenty of history-rich resources available online and maybe even at the local historian office to help you research creeks in your area with the most potential for finding gold.
Step Two: Acquire Proper Prospecting Tools & Attire
To pan for gold in small creeks, you have to have the suitable materials to get started. Below is a brief list of the equipment you’ll need to pan for gold in a creek:
-
- Gold Pan: A gold pan is a shallow plastic pan used to help sift away silt and other debris from any gold flakes or nuggets present in the sediment. Gold pans are an excellent way to extract small amounts of gold.
-
- Sluice Box: A sluice box is a long narrow channel that recovers the gold and other valuable minerals within a special matting as water flows through it.
-
- Shovel/spade: A small shovel or spade can for panning gold out of dry creek beds or shallow wet creek beds. Use a shovel to get below the layer of light silt on the surface of the river bed to get to the black sand and potential gold deposits beneath it.
-
- Snuffer: The snuffer collects the gold flakes to funnel into jars or vials carefully. A snuffer bottle makes it easier to transport your gold finds without accidentally spilling anything that you find.
-
- Wide-mouth bottle: Use wide-mouth bottles or vials to store any gold dust or nuggets you find since more narrow bottles may cause you to spill your findings accidentally. Choose bottles with a tight-fitting lid, so you don’t have to worry about them coming loose.
-
- Waterproof boots or slickers: Creeks are often cold and created by mountain snowmelt. You’ll want to pack lined waterproof boots or a slicker to prevent hypothermia from getting wet.
Having the suitable materials to pan for gold is half the battle in looking for it. Without the right supplies, you won’t have any way to find gold or transport it once you have it reliably.
Step Three: Search The Parts Of The Creek With The Most Potential
Where to Look for Gold in Creeks
The other half of the equation for panning for gold in creeks is knowing the part of the creek where gold deposits are most likely to be found. Here are just a few places where you can find pan for gold in creeks:
-
-
- Shallows: Stick to water six inches deep or less to find gold deposits. Deeper water is often too murky or full of debris like fallen leaves, making finding gold harder.
-
- River bends: River bends, and other obstructions to the river’s currents are perfect places for gold deposits to collect over time. (Business Insider)
-
- Bedrock cracks: Cracks in the bedrock often reveal precious minerals within, and the current pulling at these cracks can loosen gold dust and nuggets from inside them.
-
- Intersections: Intersections in the creek where it meets another waterway (also known as confluences) are a great place to find mineral deposits because the conflicting currents end up trapping silt in one place.
-
- The base of waterfalls: The bottom of waterfalls is another spot in a creek where silt and sediment will build up over time, increasing the likelihood of gold depositing there.
-
- Slow current: Choose parts of the creek where the current is slow. Not only does this make it easier to see potential gold dust or other areas of interest in the water, but it also decreases the likelihood that gold deposits flow downstream.
-
All of the above are great spots to get started if you’re test-panning a creek for potential gold deposits. Be sure to carefully mark each area you’ve panned to determine which parts of the creek you still need to check.
How Do You Pan for Gold in Small Creeks?
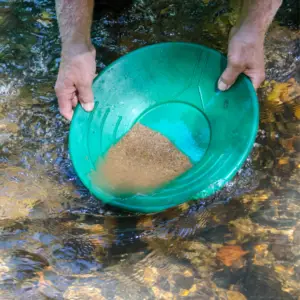
Since gold is heavier than other sediment types, it always sinks to the bottom of the gold pan while sifting. The process of panning for gold in a creek is as simple as scooping up a pan of silt and gravel and slowly sifting it through the gold pan to look for any gold dust or nuggets.
Below is a quick summary of how to use a gold pan:
1. Identify worthy materials and scoop portions of them into the pan.
2. Classify the material by removing large rocks to focus on the smaller deposits.
3. Ensure the material in your pan is wet. Using a slow and steady pace, shake the pan back and forth (this allows the gold to separate and fall to the bottom of the pan), keeping the pan at a slight angle. Almost simultaneously, reduce the heavier materials by carefully rinsing the top layer of sediments.
3. Continue this process until only a concentrate of black sand remains. With only an inch of water in the pan, carefully swirl the sand around, looking for gold nuggets and flakes.
4. Repeat this process, carefully reducing the amount of sand each time.
5. Finally, remove the gold from the pan using a magnet or suffer and place it in a recovery bottle.
How Do You Tell If There Is Gold in a Creek?
The easiest way to determine whether there is gold in a creek is to figure out whether other people have found gold in the area previously or not. There are no untapped gold prospecting areas in America, so chances are someone has panned for gold already in the area you’re considering.
Check out the (GPAA) to learn more about creeks where prospectors find gold. Note that you’ll need to ensure you’re panning for gold on public land and that there are no regulations against mining the area. Most states have an online resource dictating gold deposits locations. (Source: RareGoldNuggets)
It’s also a good idea to make sure you’re not on private property. It’s illegal to gold pan on someone else’s land without their explicit permission.
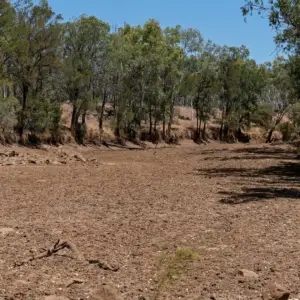
How To Find Gold In A Dry Creek Bed
Finding gold in a dry creek bed is sometimes easier than active wet creeks because erosion can leave gold deposits close to the surface without the chance of running water washing it away.
5 Steps To Finding Gold In A Dry Creek Bed
- Make An Initial Pass With A Metal Detector To Identify Nuggets Or Hot Beds
- Identify The Bedrock And Sweep Away Topsoil and Debris
- Sweep The Bedrock Floor With A Broom Or Paintbrush To Identify Small Red Pockets Of Gravel
- Scrape The Top Layer Of The Bedrock And Gravel Pockets To Loosen The Sediments
- Collect The Loose Gravel And Claystone In A Bucket
- Pass The Collection Of Gravel Through A Wet Sluice Box
For more on this entire process, purchase the book: Prospecting For Gold by Ion Idriess
Moving creeks aren’t the only place you can potentially find placer gold deposits. Dry creek beds are another place where you can potentially find gold. However, you will need an alternative water source to help sift away the sediment to find gold from the creek bed.
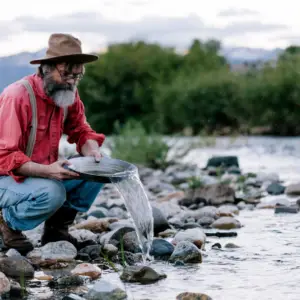
Panning for Gold in Creeks is a Fun Hobby
Panning for gold in creeks is an exciting and fun way to spend an afternoon or begin your prospecting journey. You never know what you’re going to find! Just a few pieces of equipment and a good location are enough to get started.